We are asked often about “How to install a fence post” So, we thought we would share observations and insight from our years of experience. The whole process is rewarding and encouraging, providing everything goes well! New or upgraded fencing will improve your home environment and increase the likelihood of you, your family, and friends spending increased time in your outdoor space. Read on as we provide a step-by-step guide about all you will need for successful fence post installation.
Editor’s Note [29.04.2024]:
Our article about how to install a fence post and panels was originally published on January 17, 2017. Today we have added new sections including preparing for fence panel and fence post installation, equipment & supplies lists, common mistakes to avoid in fence installation, related articles, and a conclusion section. In addition, we have revised areas of existing content as well.
Introduction to how to install fencing
Are you exploring the world of fence installation? Let us get you prepared and ready. Learning how to install a fence post is more than just digging a post hole; it is about setting the stage for your garden's new look. From gathering your toolkit to measuring up each post, every step counts in making your fence both sturdy and stylish. And hey, it's not just about putting up barriers; it's about transforming your outdoor space into a personal paradise. So, grab your gear, follow our step-by-step guide, and let's turn those fence dreams into reality.
Preparing for fence panel and fence post installation
There are several preparatory tasks in our “How to install a fence post guide”. These include gaining access to tools, other equipment, additional supplies, and materials. Other tasks are included in our step-by-step guide and include checking for underground pipes and creating a tick list plan to ensure you complete all the required tasks.
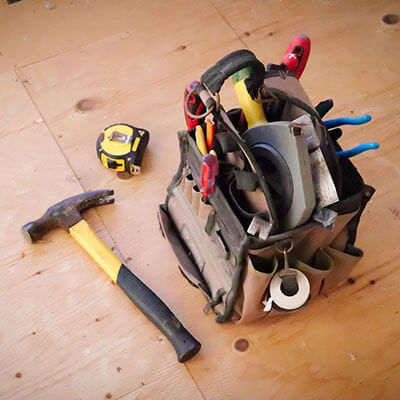
Tools needed
The following tools will all be needed to install fence panels and posts:
- Chisel
- Drill
- Fence post hole digger
- Hammer
- Post level
- Saw
- Screwdriver
- Spade
- Spirit level
- String line
- Trowel

Other equipment
The following other equipment will prove invaluable:
- Bucket
- First aid kit
- Paintbrush or roller
- Rake
- Safety equipment – safety goggles, knee protection pads, and work gloves
- Tape measure
- Wheelbarrow
Additional supplies and materials
Also, having access to the following additional supplies and materials will be invaluable:
- Concrete mix
- Fence panels
- Fence posts
- Gravel boards
- Hardcore / gravel
- Nails or screws
- Paint or stain
- Post caps or finials (optional)
- Rubble bags
- Timber battens
- Timber for bracing
- U-brackets
- L-brackets
- Water source (hose or bucket)
- Wood screws
How to install a fence post directly into soil
Below is a step-by-step guide for everything you need to know (applying to both wooden fence posts and concrete fence posts):
Prep work
Before you start, make sure you have checked for any underground cables or pipes. You do not want to turn your DIY project into an episode of 'Disaster DIY'.
Measure up
Use your tape measure to get the depth of the hole spot on. The “quarter of your fence post underground” ratio is crucial for stability, so make sure this is accurately measured. When you are digging the post holes, make sure they are deep enough to keep the posts sturdy. These are like tree roots; you want those roots (or posts) deep in the ground.
Place in the hole
When you are placing the post in the hole, get help to hold it steady.
Cement and water
When adding water to the cement, do not apply an excessive amount. You want to add just enough to soak the dry mix without making a mini swimming pool.
Keep it level
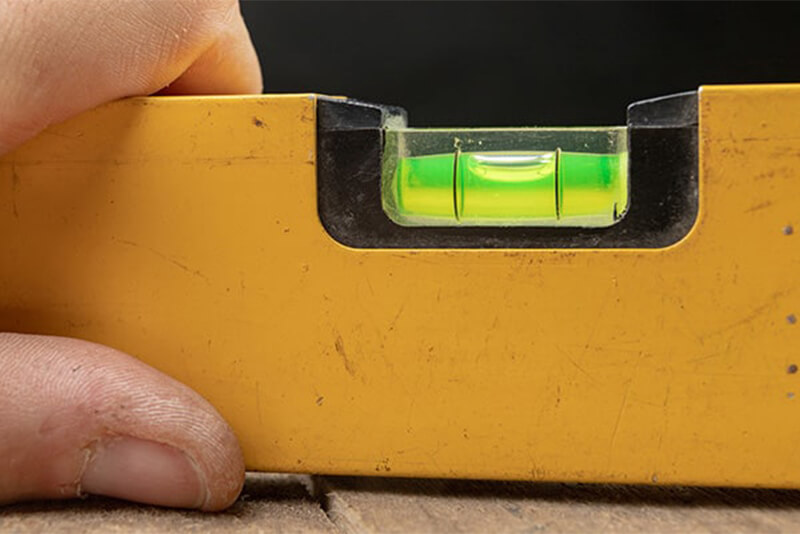
Keep a spirit level close. A wonky post is a nightmare, and you do not want your fence looking like it is unbalanced.

Brace yourself
Temporary battens are not just an afterthought. They are like the training wheels of your fence post. Make sure they are sturdy enough to keep the post in place while the cement sets.
Patience whilst cement sets
Do not rush to remove the battens. Give the cement time to harden properly, – think of it like allowing time for a cake to set in the fridge.
Clean-up
Once you are done, give the area a good clean-up. Leaving tools lying around is a recipe for a comedy movie-style trip-up.
We also recommend reading our two related in-depth guides:
Step-by-step guide: how to fit fence panels
Alright, let us break down this guide on fitting fence panels with extra pointers to make sure you are on track for a top-notch fence.
Start with a plan
Before anything, sketch out a plan of your fence line. This plan will guide you through the whole process.
Checking the equipment
Make sure you have all the tools and supplies before you start. There is nothing worse than getting halfway and realising you are missing a crucial piece of kit.
String line precision
When you are laying out that string line, accuracy is key. Think of it as drawing the blueprint directly onto your garden.
Measuring up
Use the panel board not just for distance, but also for aligning your posts. It has similarities to using a ruler in art class, it helps to keep things neat. Before securing fence panels to the posts with screws or nails, drill pilot holes.
L-brackets and levelling
L-brackets are not just for show. Make sure they are perfectly level before attaching anything. A wonky base will make the whole fence look off.
U-brackets and panels
When attaching U-brackets, keep them uniform in height for a cleaner look. Precision here means a more professional finish.
Panel placement
Slide those panels in carefully and secure them snugly. It is like fitting puzzle pieces and is satisfying when they slot in exactly right.
Final checks
Once all the panels are in place, step back and check for any misalignments or loose fittings. A little tweak here and there can make a big difference.
Post caps
Do not forget the post caps or finials for a polished look. It is like putting a cherry on top of a cake and finishes off the fencing nicely.
Weatherproofing
For dip treated fencing, give the whole fence a cover with a weatherproofing treatment. This will not be necessary for pressure treated fencing, which will last for many years without treatment. This treatment will give your fencing a shield against the British weather.
Clean-up
Finally, tidy up your workspace. Leaving things neat and clean is a sign of a job well done.
Common mistakes to avoid in fence installation
Kicking off a fence installation project can feel a bit like a garden adventure, but even the best of us can trip up sometimes. To save you from common slip-ups, we are going to shine a light on what not to do. Think of this as your quick guide to sidestepping those annoying pitfalls and making your fence installation smooth sailing:
- Forgetting underground utilities - be vigilant for utility cables and pipes which might lie underground. Fracturing a water pipe, or even worse a gas pipe, will hastily bring your fencing installation to an abrupt end
- Ignoring local regulations - fencing is an area of the garden, which is subject to UK planning law. BEFORE installing your fence, be aware of your local planning laws, you will want to avoid prosecution later
- Improper post setting - installing fence posts whether in soil or concrete is an important task. If this is completed incorrectly it will impact the medium-long term viability of the fencing run
- Inaccurate measurements - you cannot measure too much, measure twice, cut once is a good approach. Measuring is a simple task, and the consequences of wrong measurements include a wonky, uneven, and aesthetically displeasing fencing run
- Neglecting weather conditions - check your weather forecast one to two days before and on the day, both before and after the fencing installation is completed. Try to install in dry fine weather and avoid rain, muddy and generally wet conditions. If necessary, delay the installation
- Not planning for wood expansion - wood is a natural product, as it takes on moisture it will expand. Ensure you give a little room for expansion as this will avoid warping and buckling
- Not preparing the area - nobody wants to work amongst rubbish and debris. Before you start the installation, clear the area of any debris and plant growth
- Overlooking gate placement - if you are installing a gate, plan its location wisely for easy access
- Overlooking post depth - do not underestimate the importance of post depth. Fencing post underground is like the anchor of a ship, it keeps the fencing steady and stops movement, particularly in adverse weather conditions. Remember the one-third rule, for example, for an 8’ post 2’ would be underground and 6’ would be visible above ground level
- Rushing the process - avoid rushing and take your time by allowing a generous amount of time to complete the work. Plan to finish in daylight hours, which in the UK will be more challenging from around mid-October until late February
- Skimping on materials - do not be tempted to use cheap, low-quality materials. Strong fences need to last for many years and need high-quality components to withstand harsh British weather
- Using inconsistent panel heights - buy the same height of fence panels, a 4’ high next to a 5’ high looks strange and unprofessional (unless it is to accommodate a slope). Insist with your supplier when you buy fencing that all panels are to a uniform height
Related articles
Read these selected articles from the Buy Fencing Direct blog to expand your knowledge on how to install a fence post and associated topics:
Conclusion: creating a sturdy and attractive garden fence
Preparing for your fencing project is key, think of it like gearing up for a mini adventure in your garden. From accessing the right tools to avoiding common installation errors, it is all about getting it right the first time.
Our step-by-step guide will walk you through how to install fencing from start to finish. Whether you are burying posts in the ground or lining up those fence panels, remember, precision is your best friend here. When the job is all done, step back and bask in the glory of your brand new, sturdy-as-a-rock fence. It is more than just putting up barriers; it is about creating a space that is all yours, safe and looking sharp.
Contact and guidance
If you need further advice and guidance about how to install a fence post or how to fit fence panels, our team are available for advice.
The team at Buy Fencing Direct advise on all aspects of fence post installation including how to put up a fence with wooden posts. So, for speedy advice speak to our team today.
Contact methods available are:
- Phone calls - 0333 003 0515
- E-mails – send using our contact form
- Text chat - our live chat app can be used to message us and text chat in real-time


